Sensor Integration
Ward integrates with BLE wristbands for proximity verification, elopement detection, and real-time patient list ordering.
Sensor Types
Sensor Hub
The sensor hub is an on-premise gateway running a headless daemon that:
- Processes wristband data for proximity and elopement alerts
- Monitors wristband health (battery, connectivity)
- Reports fleet telemetry (CPU, memory, disk, BLE radio status) to Ward's cloud
- Communicates securely with Ward's cloud over HTTPS
Each unit needs at least one hub.
Patient Wristbands
BLE wristbands worn by patients:
- Enable proximity verification for observations
- Enable elopement detection via fixed BLE receivers
- Provide real-time distance for patient list ordering
Assign one wristband per patient.
Fixed BLE Receivers
BLE gateways that detect wristband signals and forward to the hub via HTTP. Receivers are added from Management → Devices → Receivers → Add Receiver from within the unit they belong to.
Each receiver can serve one or more roles depending on its configuration on the receiver detail screen:
- Boundary receivers — placed at facility entrances, stairwells, and egress points. Turn on the Boundary Receiver toggle. Any confined patient detected most strongly by a boundary receiver triggers an elopement alert regardless of their geofence level.
- Unit receivers — placed in common areas, hallways, or nurses' stations. No room number needed. Catches patients who wander into another unit.
- Room receivers — placed at or in patient rooms. Set the Room on the receiver detail screen (with autocomplete from existing room numbers). Required for room-level geofences.
Hardware Setup
Installing the Hub
- Connect hub to facility network (ethernet recommended, WiFi supported)
- Power on the hub
- Wait for the hub to boot (~60 seconds) — the status LED turns red (unprovisioned)
- The hub advertises itself on the local network
Adding the Hub
- Open the Ward app on a device connected to the same network as the hub
- Navigate to Management → Devices → Add Hub
- The app discovers unprovisioned hubs on the local network
- Tap the discovered hub and select a unit assignment
- The app adds the hub and configures it automatically
- Hub confirms connection — status LED turns green
Adding Wristbands
- In Management → Devices, tap Add Wristband
- On mobile, nearby unregistered wristbands are detected automatically and listed by signal strength — tap one to select it
- Or enter the MAC address manually
- Optionally assign to a patient immediately
Wristbands can also be assigned to patients later from the patient detail screen.
Adding BLE Receivers
- Mount the receiver at the boundary point (unit exit, stairwell, facility exit, or room doorway)
- Power and network connect the receiver
- In Management → Devices, add the receiver
- Set boundary type (unit exit, stairwell, facility exit, or room doorway)
- If room doorway: select the room this receiver monitors
- Associate with the hub
Proximity Verification
With a wristband assigned to a patient, the staff handheld:
- Scans for nearby BLE wristbands
- Calculates distance from signal strength
- Auto-verifies proximity when within the configured threshold
- Records distance with the observation
Ward combines a stream of signal readings taken over a few seconds into one steady distance, rather than trusting any single reading (individual BLE readings are noisy). Proximity verifies once you've been within range for a moment.
Staff see "Proximity Verified" with distance when documenting if the wristband is detected.
Patient List Ordering
The patient list sorts by proximity — nearest patients appear first. This updates in real-time as staff move through the facility. Patients without wristbands appear below detected patients.
On wider screens (landscape tablets and desktop), the patient list is always visible as a sidebar alongside every screen, so proximity-sorted patients are accessible from the dashboard, alerts, shift view, or any other screen.
Patient Location
When fixed receivers are installed, the hub tracks each patient's current zone from the receiver that most strongly and consistently detects their wristband. If a patient is detected away from their assigned room, their patient card shows where they were last seen (for example, "Last seen in room 214" or "Last seen near facility exit"), refreshed within about a minute. This is the same zone tracking that drives elopement detection, so denser receiver coverage improves both.
Elopement Detection
For patients with elopement risk and a configured geofence:
- Assign a wristband to the patient
- Configure geofence level (unit, floor, or campus — room level available when room doorway receivers are installed)
- Fixed BLE receivers detect the wristband at boundaries
- Hub evaluates whether detection constitutes a violation
- Alert triggers after confirmation
Geofencing
Patients can be confined to a zone by setting their Geofence Level on the patient edit screen:
| Level | Violation trigger |
|---|---|
| None | Geofencing is disabled for this patient. |
| Room | The patient is detected strongest by a receiver in a different room, a different unit, or at a boundary. |
| Unit | The patient is detected strongest by a receiver in a different unit or at a boundary. |
| Facility | The patient is detected strongest by a boundary receiver. Movement between units inside the facility is allowed. |
Before treating a patient as out of zone, the hub confirms the winning receiver across a short rolling window: it must lead the runner-up by at least 6 dB and hold over several consecutive readings, so a single stray signal bleeding through a wall does not page staff. A confirmed violation escalates if the patient reaches a more severe boundary and does not re-fire while they stay at the same one. Alerts re-arm when the patient returns to an authorized zone.
Setup requirements:
- Patient must have a wristband assigned. The patient edit screen warns when a geofence level is set but no wristband is assigned.
- For Room level, a BLE receiver must be installed in the patient's room. The edit screen warns when the selected room has no matching receiver.
- For Facility level, at least one receiver must have Boundary Receiver enabled.
Configuration change propagation
Geofence-related configuration is cached on the hub and refreshed every 5 minutes. Changes to any of the following take up to 5 minutes to take effect on active detection:
- Patient geofence level
- Patient wristband assignment
- Patient room or unit reassignment
- Receiver room assignment
- Adding or removing a receiver
- Toggling a receiver's boundary flag
This is by design — the hub avoids chattering with the cloud for every change and tolerates brief cloud outages. Plan deployment changes with the 5-minute window in mind; for time-critical changes (a patient who just became an elopement risk, for instance), expect up to 5 minutes before detection reflects the new configuration.
Wristband Health
The hub continuously monitors all registered wristbands:
- Battery: Warning at 20%, critical at 10%
- Connectivity: A Device Offline alert fires if a wristband, receiver, or hub goes unseen for about 10 minutes. For an admitted patient's wristband, a shorter gap (about 3 minutes) raises a Patient Not Detected alert, since losing track of a monitored patient matters sooner than hardware health.
Health indicators appear on patient cards and in the device management screen.
Device Management
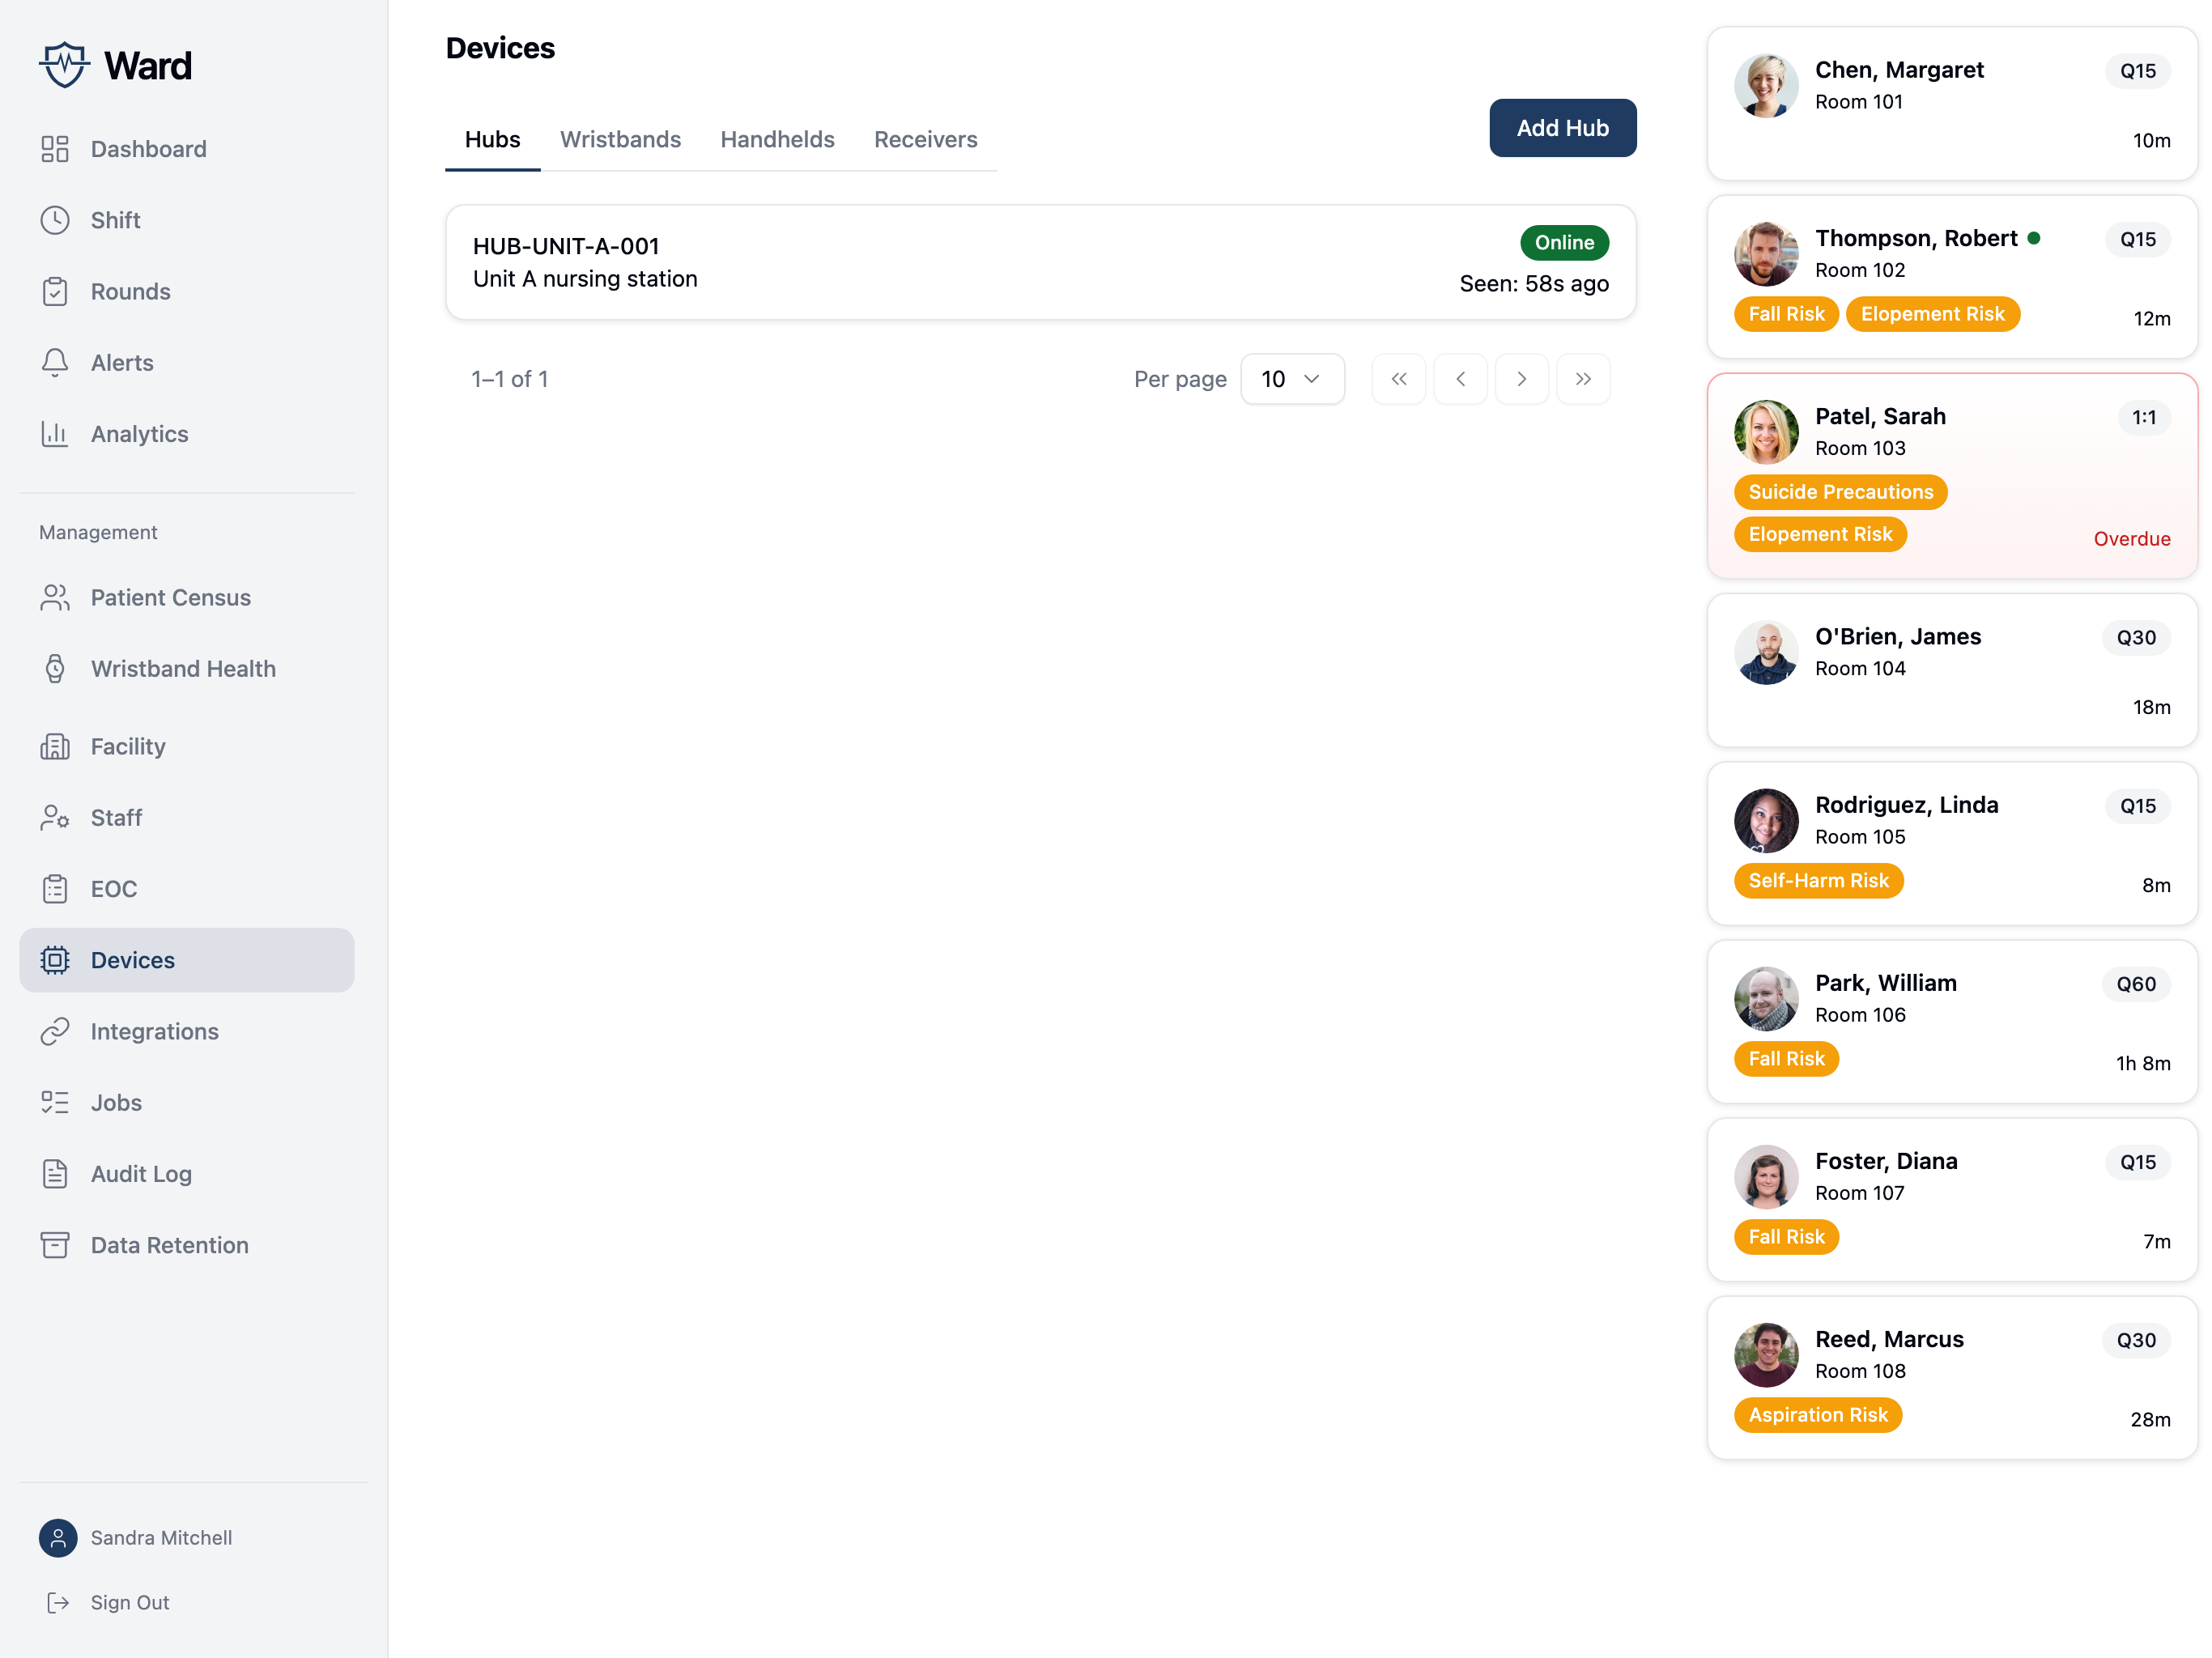
Viewing Device Status
Navigate to Management → Devices to see:
- All registered devices (hubs, wristbands, receivers, staff handhelds)
- Online/offline status
- Battery level (wristbands)
- Last seen timestamp
- Hub software version and health metrics
Hub Fleet Management
The device management screen provides fleet-level visibility for hubs:
- Status: Online/offline, software version, uptime
- Health: CPU, memory, disk usage, CPU temperature, BLE radio status
Device Health Alerts
Ward alerts when devices have issues:
- Wristband battery low or critical
- Wristband, receiver, or hub offline
- Hub degraded (high CPU, low disk)
Hub Status LED
The hub has an LED that indicates its current state:
| Pattern | Meaning |
|---|---|
| Solid green | Connected to Ward's cloud |
| Solid red | Unprovisioned — needs to be registered |
| Alternating green/red blink | Provisioned but can't reach cloud |
| Red blink | Error |
Troubleshooting
Hub offline:
- Check the status LED (see table above)
- Check power connection
- Verify network connectivity
- If on the same network, use Local Diagnostics:
- Open the hub's detail screen in Management → Devices
- Enter the hub's hostname (e.g.
ward-hub-1.local) or IP address - View real-time CPU, memory, BLE radio status, uptime, and wristband count
- Restart the hub if needed
Wristband not detecting:
- Check battery level
- Verify wristband is assigned to patient
- Ensure staff handheld has Bluetooth enabled
Proximity not verifying:
- Confirm patient has a wristband assigned
- Check that staff handheld BLE scanning is active
- Move closer to patient — RSSI accuracy improves at shorter range
- Run RSSI calibration in unit settings if distances seem inaccurate
Distance readings seem wrong:
- Run RSSI calibration (Management → Facility → Edit Unit → Calibrate)
- Ensure calibration was done in the same environment where you're testing
Enterprise RTLS Integration
For facilities with existing Real-Time Location Systems, Ward can integrate with your current infrastructure through custom integration projects.
Contact your Ward representative to discuss RTLS integration requirements.